
Last Updated on April 6, 2023
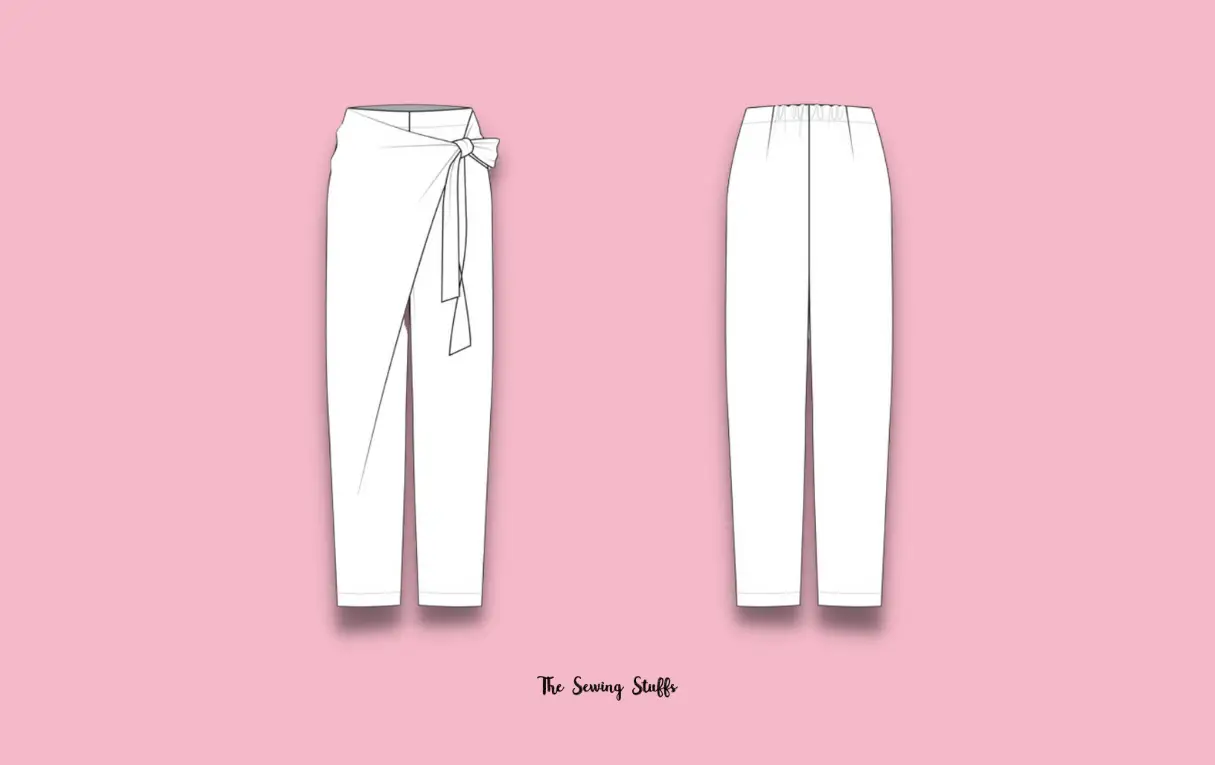
Hi, this is Tersia Jager, a DIY sewing enthusiast based in NY. Today, I’ll show you how to make a pair of wraparound trousers. This design emerged around the 1970s and remains trendy, stylish, and comfortable. I will guide you through the measurements, wrap pants sewing pattern, and construction process in this article.
What are wrap pants?
Wrap pants are a type of clothing that can be wrapped around the waist and worn as a pair of pants or shorts. They are typically made of lightweight, flowy materials such as cotton, rayon, or silk, often featuring a tie or knot closure at the waist.
Wrap pants are popular in many cultures, including Southeast Asia and Africa, and are often worn for comfort and ease of movement. They can also be a versatile addition to a wardrobe, as they can be dressed up or down depending on the occasion.
What culture are wrap pants from?
Wrap pants, also known as fisherman pants or sarouel pants, have origins in various cultures around the world. They are commonly associated with Southeast Asian countries like Thailand, where fishermen traditionally wear them due to their loose, comfortable fit and ease of movement.
However, similar styles of wrap pants can also be found in other regions, such as North Africa, the Middle East, and India, where they are often called harem pants or dhoti. Wrap pants’ versatility, comfort, and adaptability have contributed to their popularity across different cultures and geographic locations.
Wrap Pants Sewing Pattern (Images)
Source: Youtube
Source: Youtube
Source: Youtube

Source: Youtube
Source: Youtube
Source: Youtube
Source: Youtube
Source: Youtube
Source: Youtube
Source: Youtube
Source: Youtube
Source: Youtube
Source: Youtube
How do you make wrap pants?
To make wrap pants, you will need a few basic materials such as fabric, scissors, a measuring tape, and a sewing machine. Here are some basic steps to follow:
Materials and Measurements Needed:
- Fabric (lightweight with good movement and drape)
- Measuring tape
- Tailor’s chalk or marking tool
- Pins
- Scissors
- Iron
- Sewing machine
You’ll need the following measurements:
- Waist circumference
- Hip depth
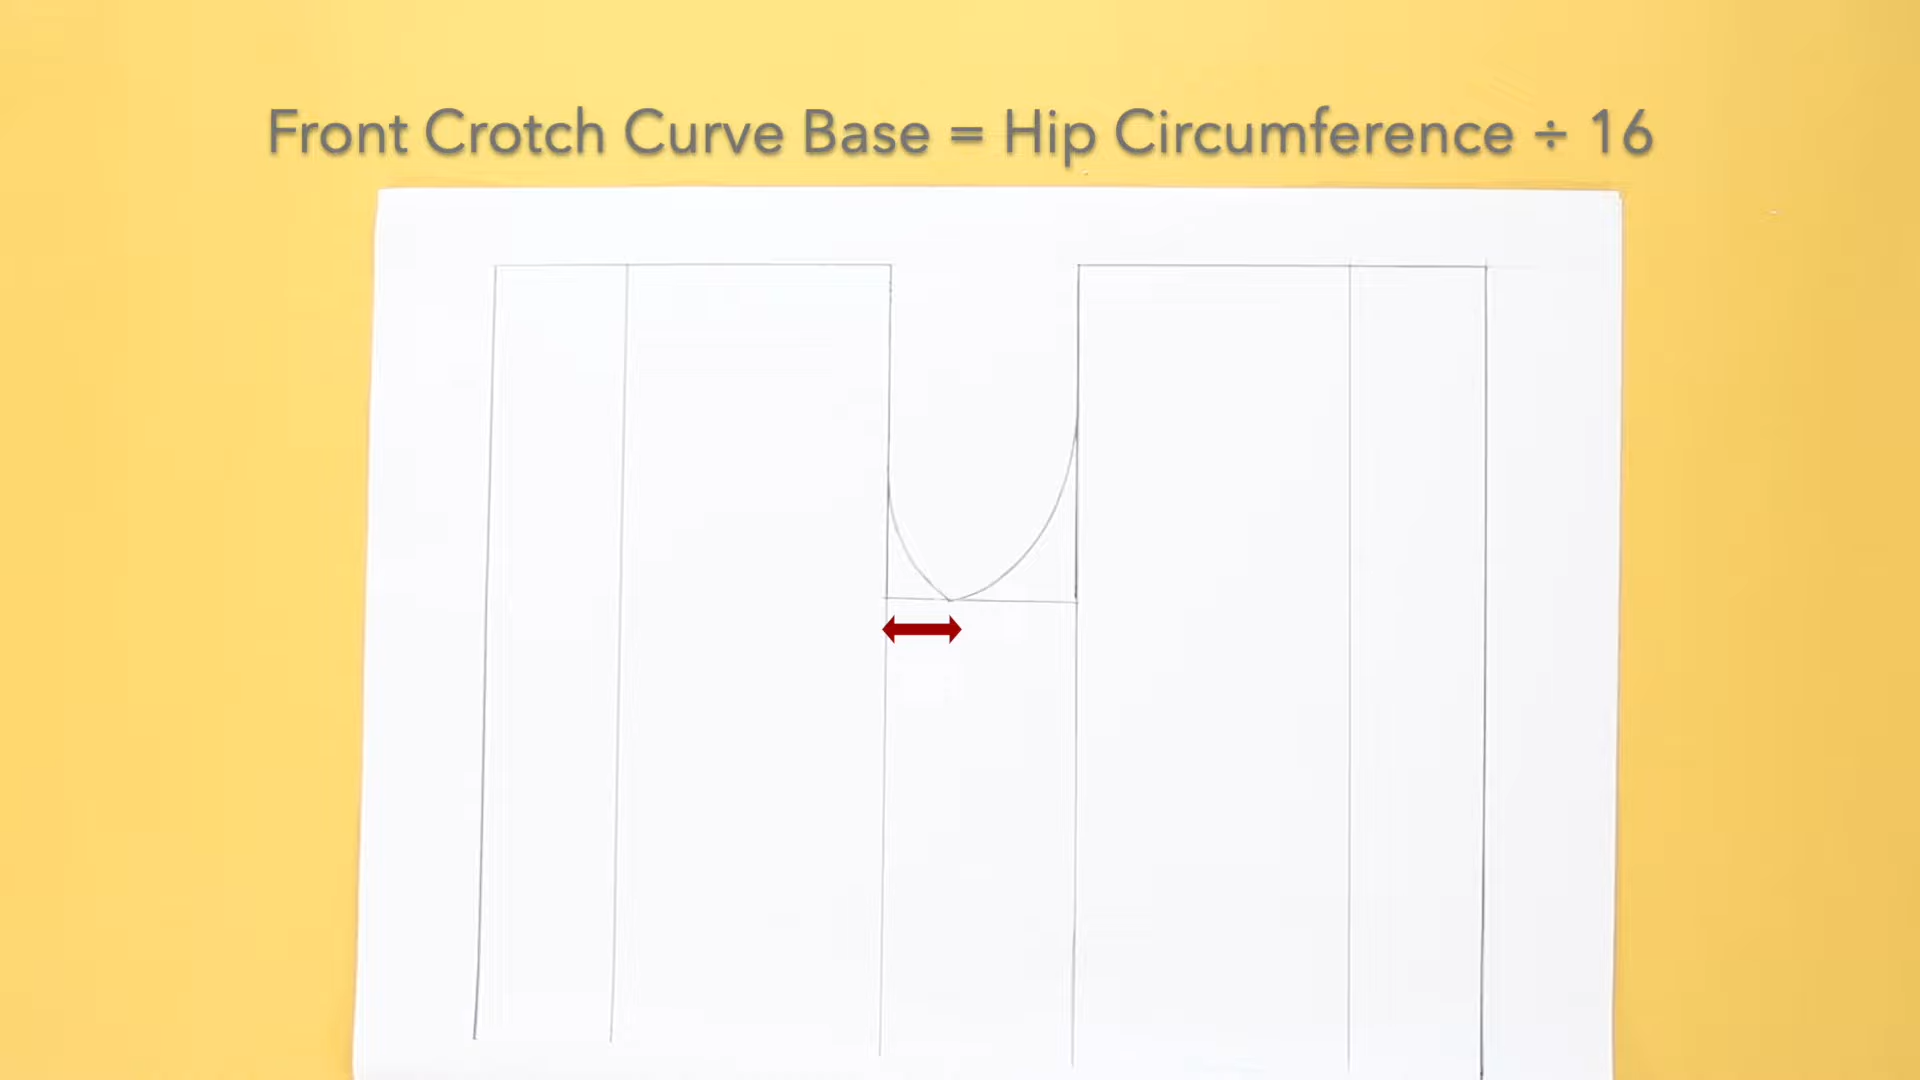
- Hip circumference
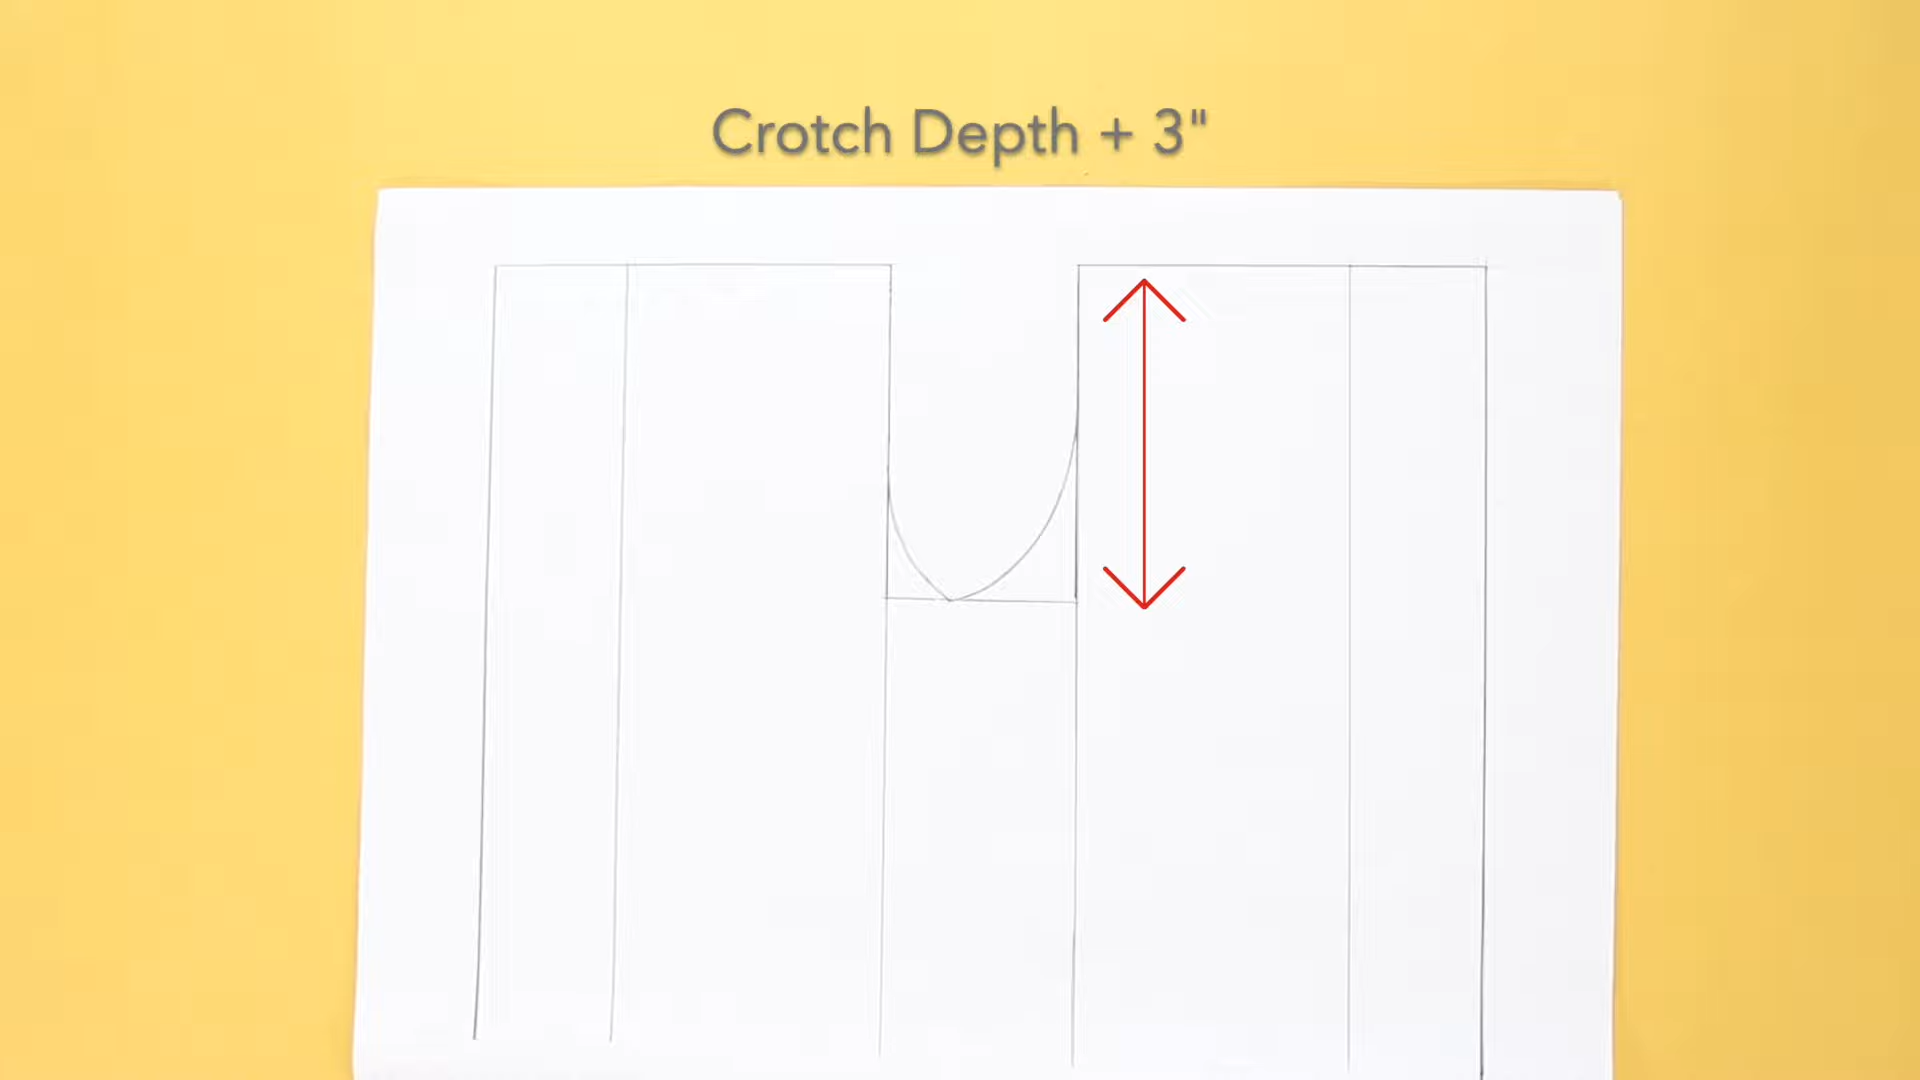
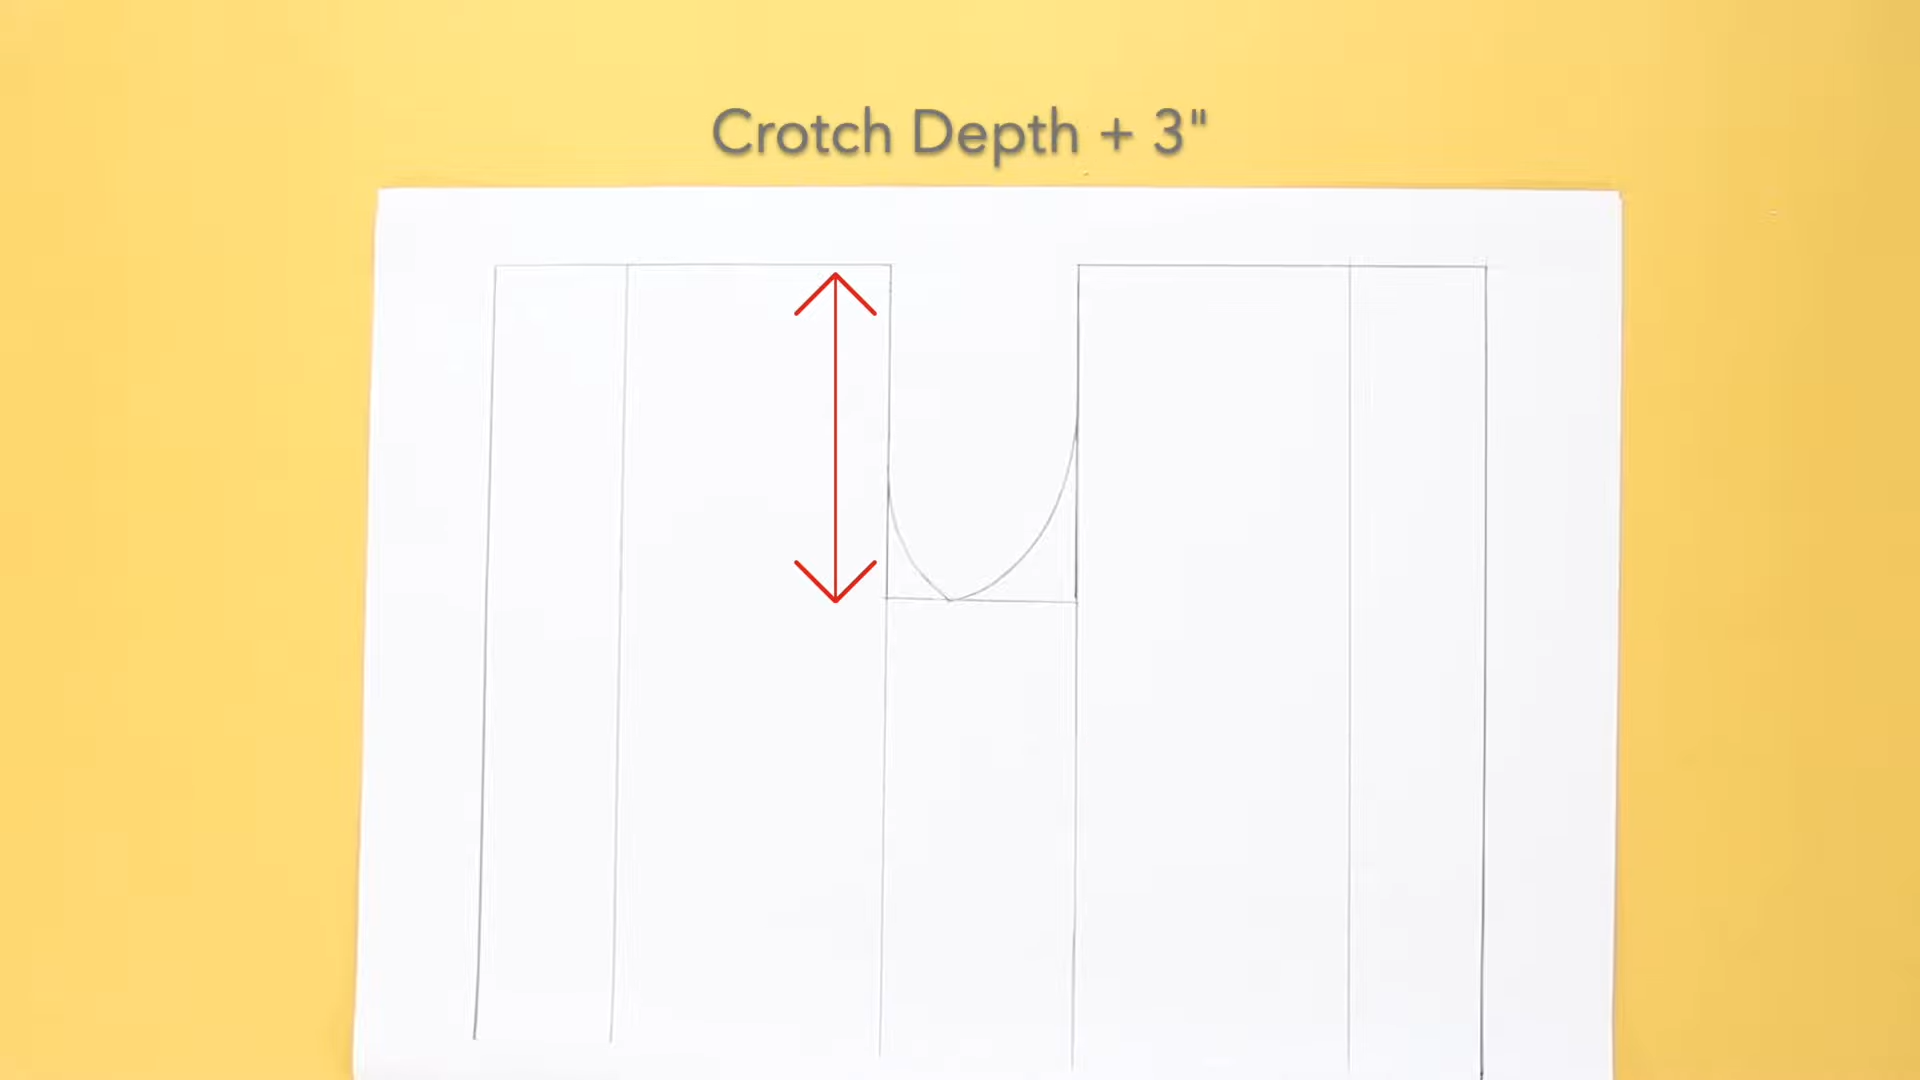
- Crotch depth
- Trouser length
Steps:
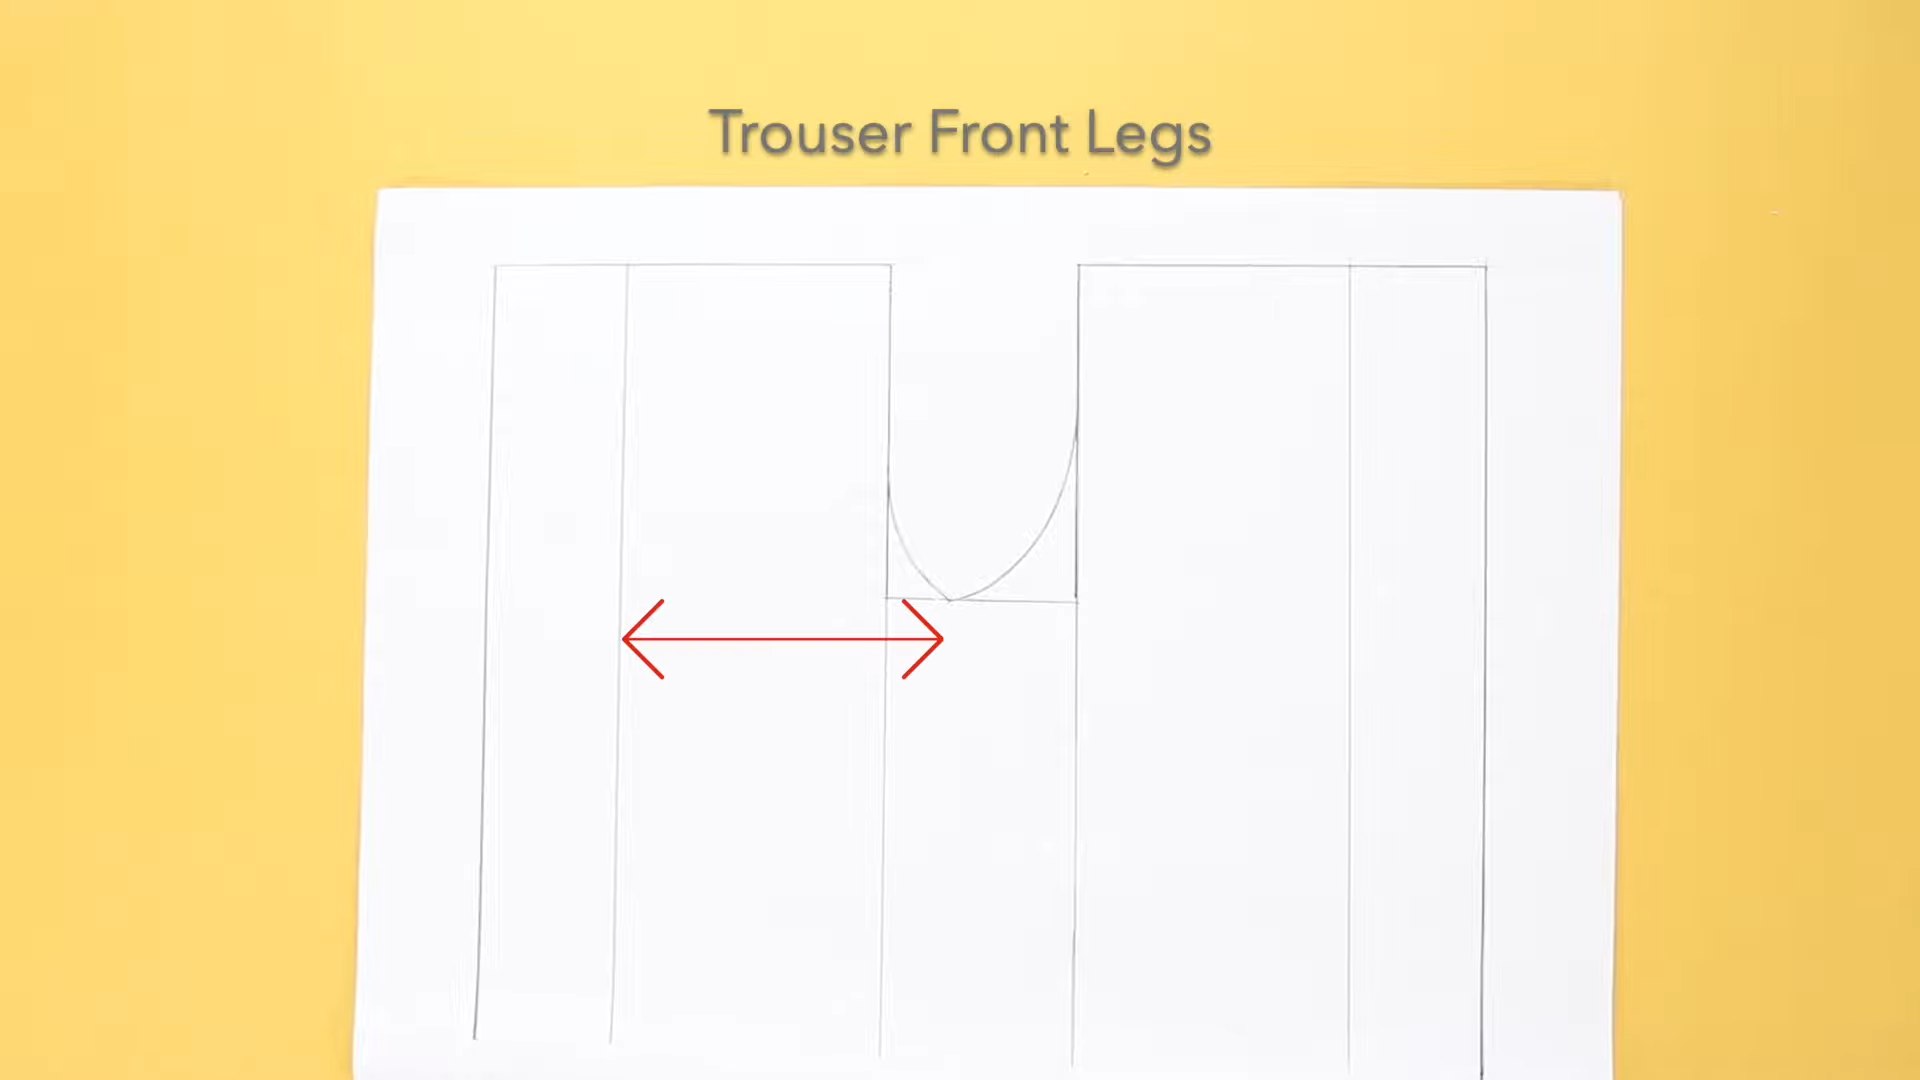
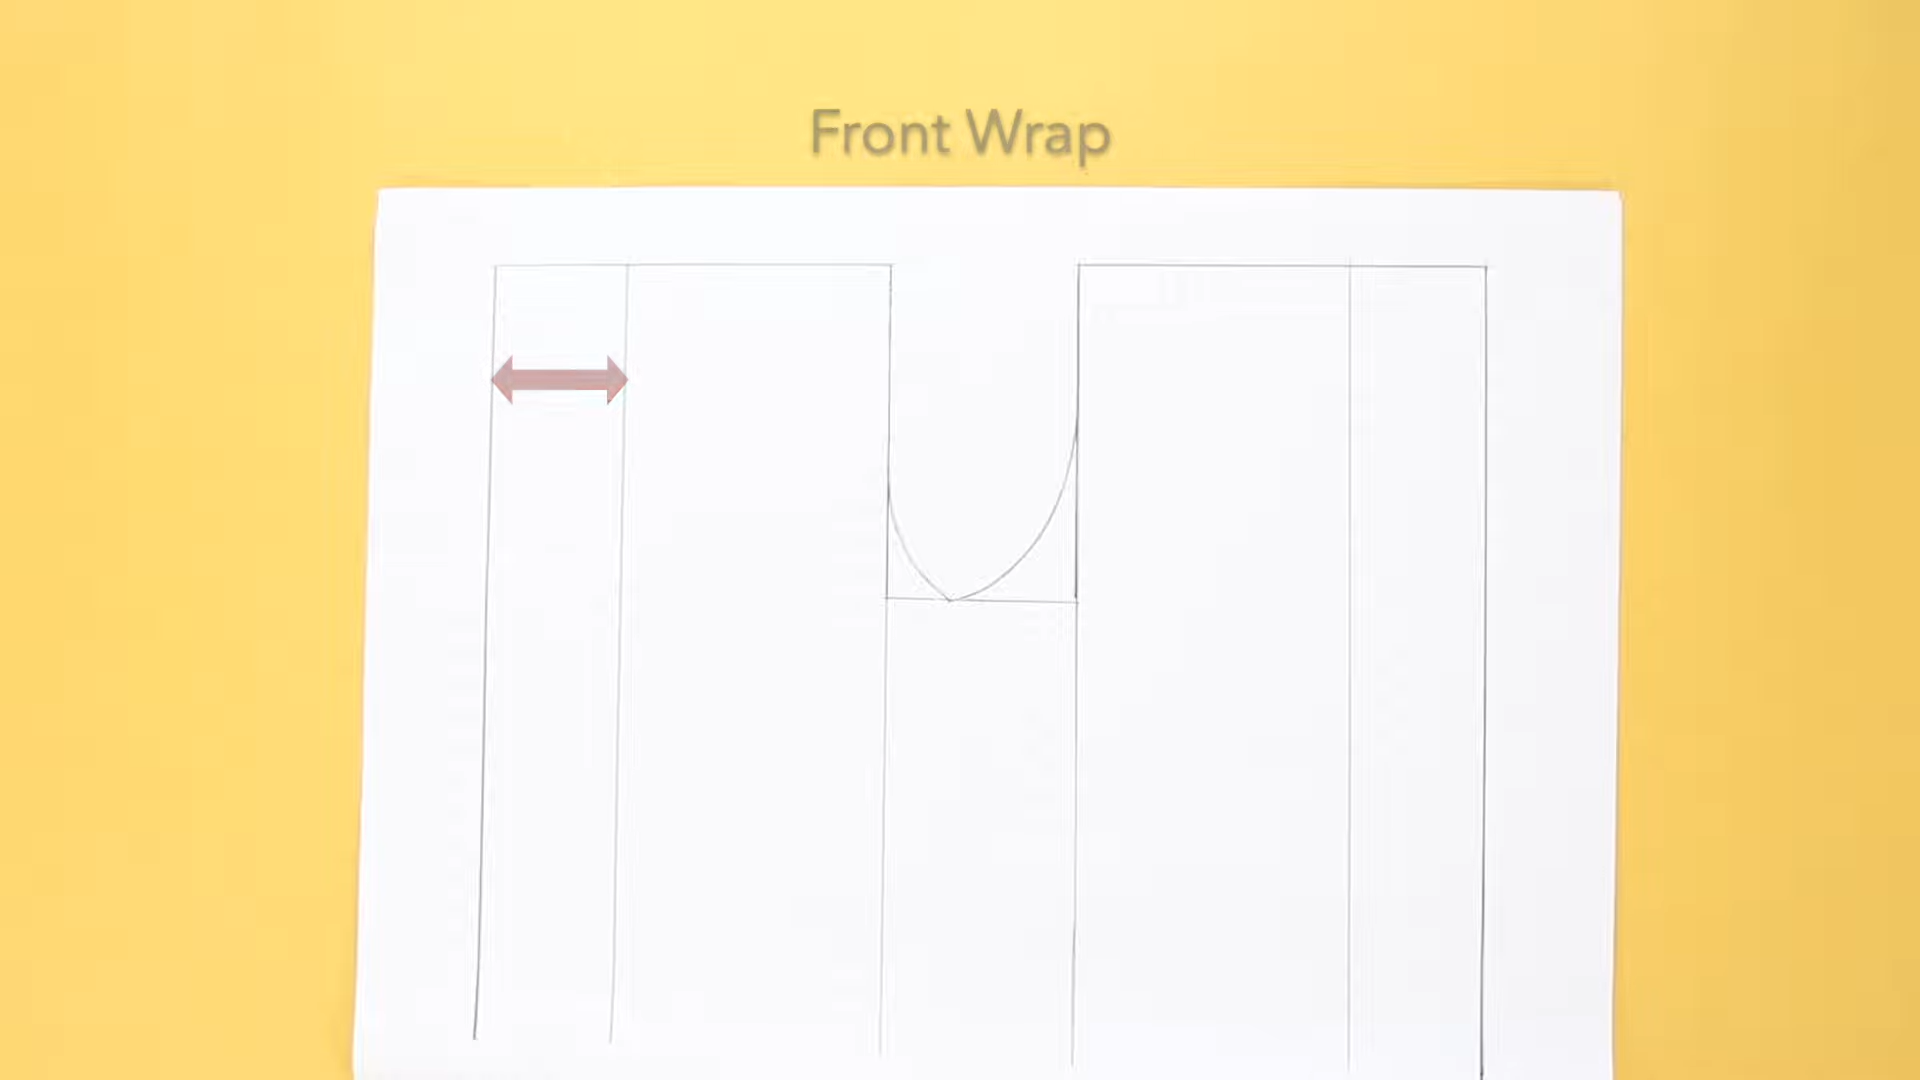
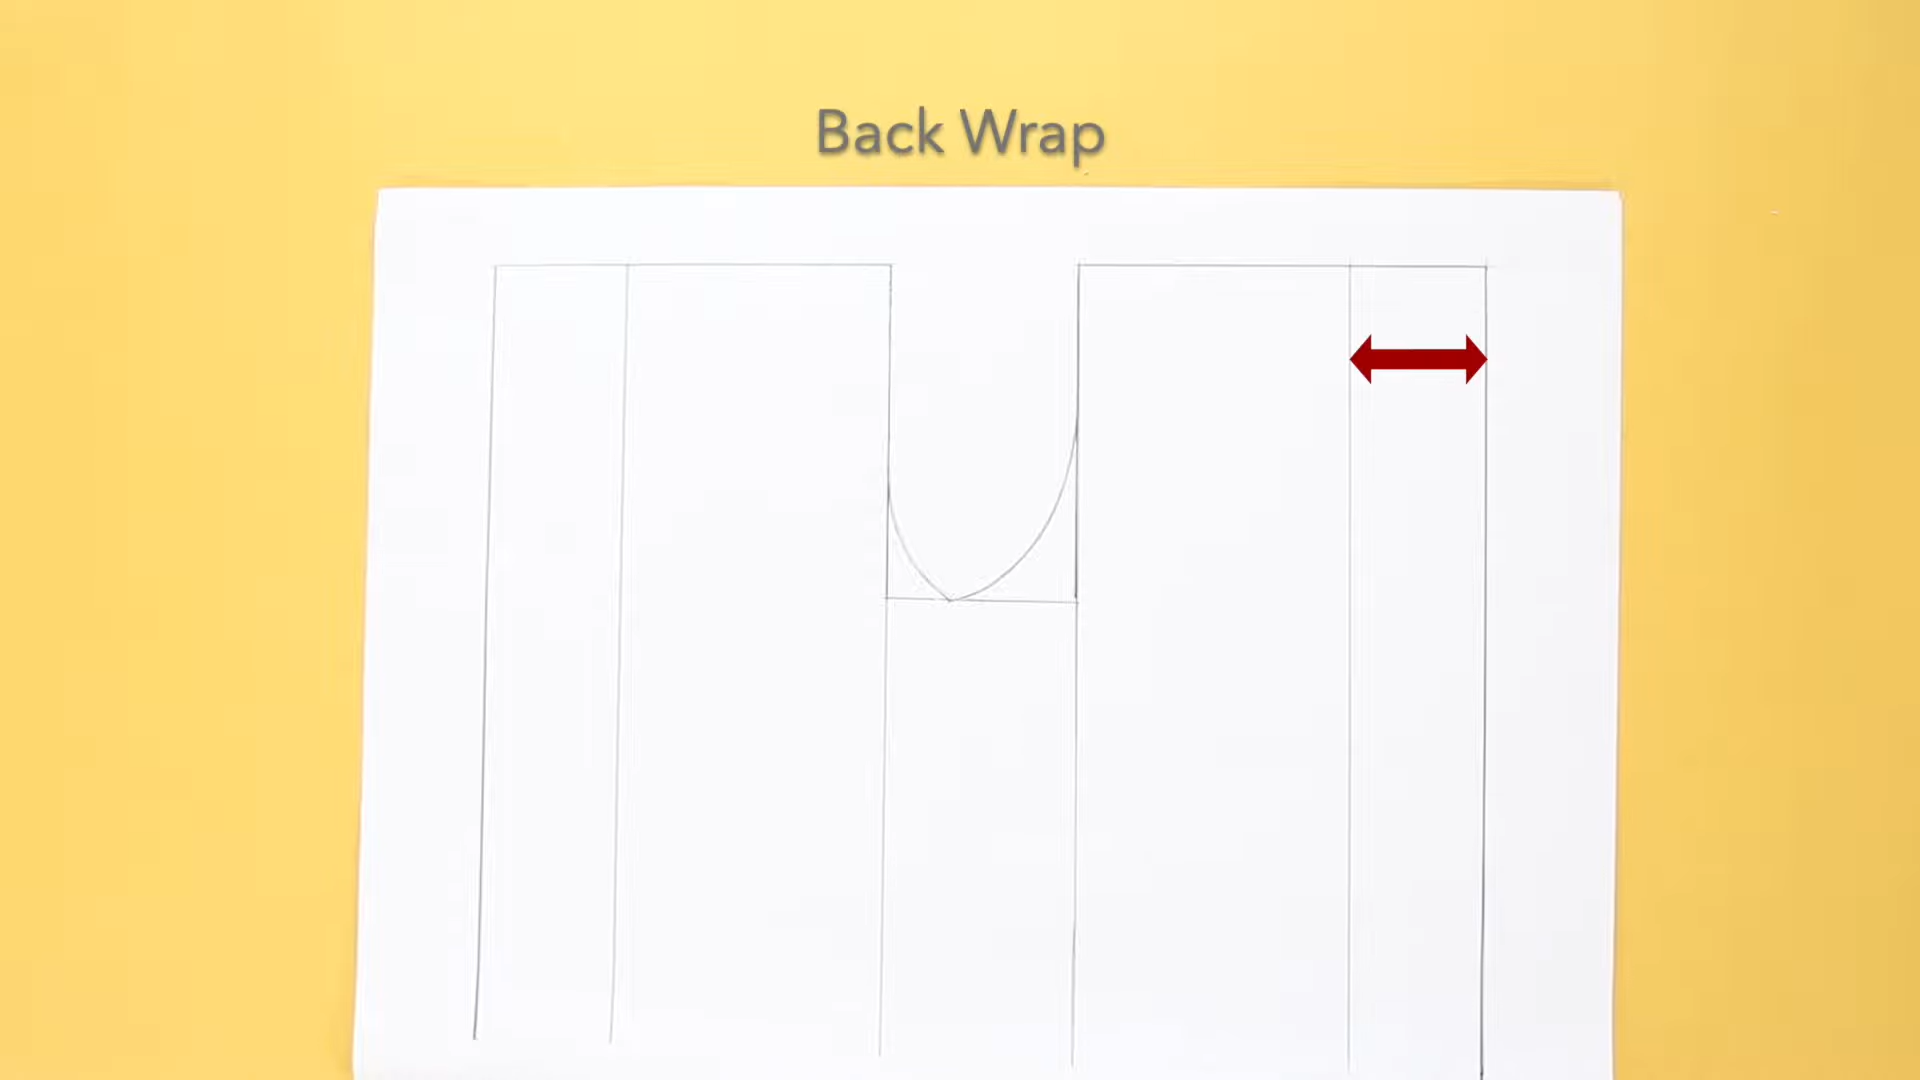
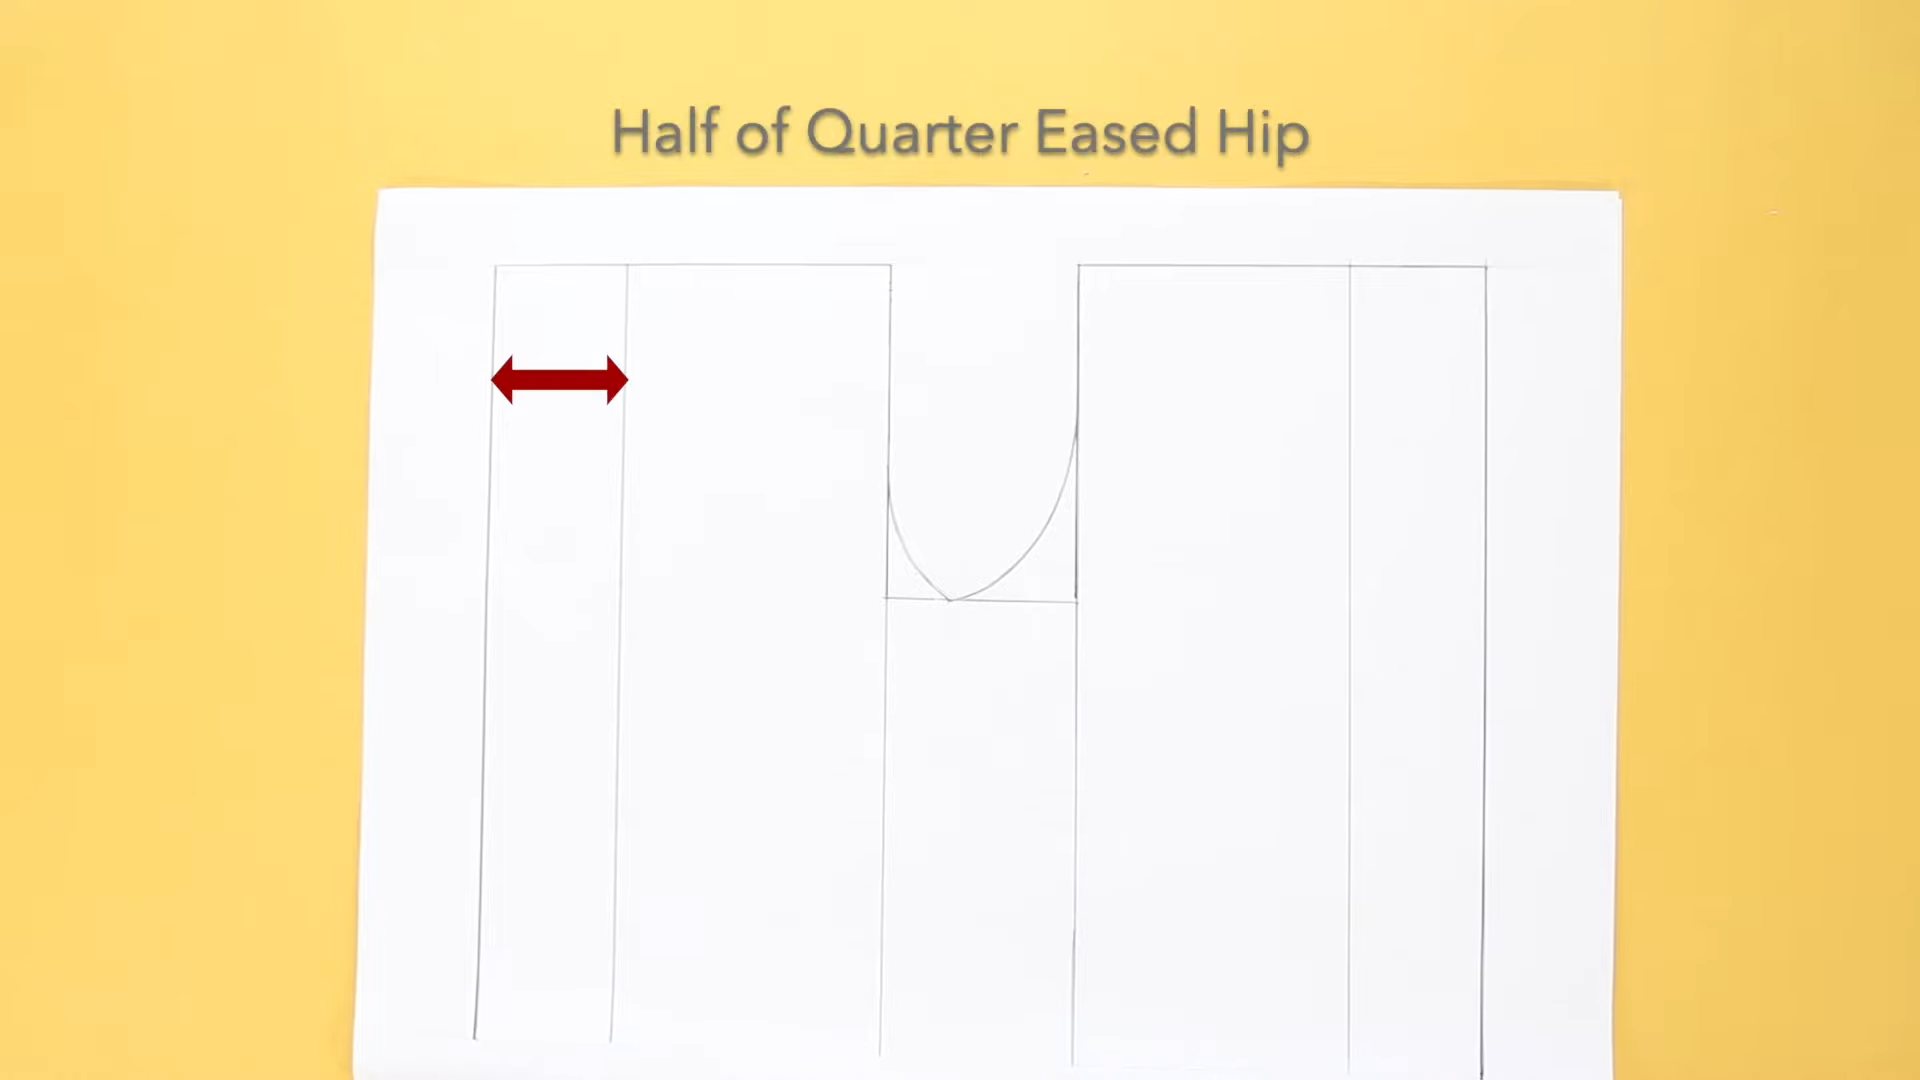
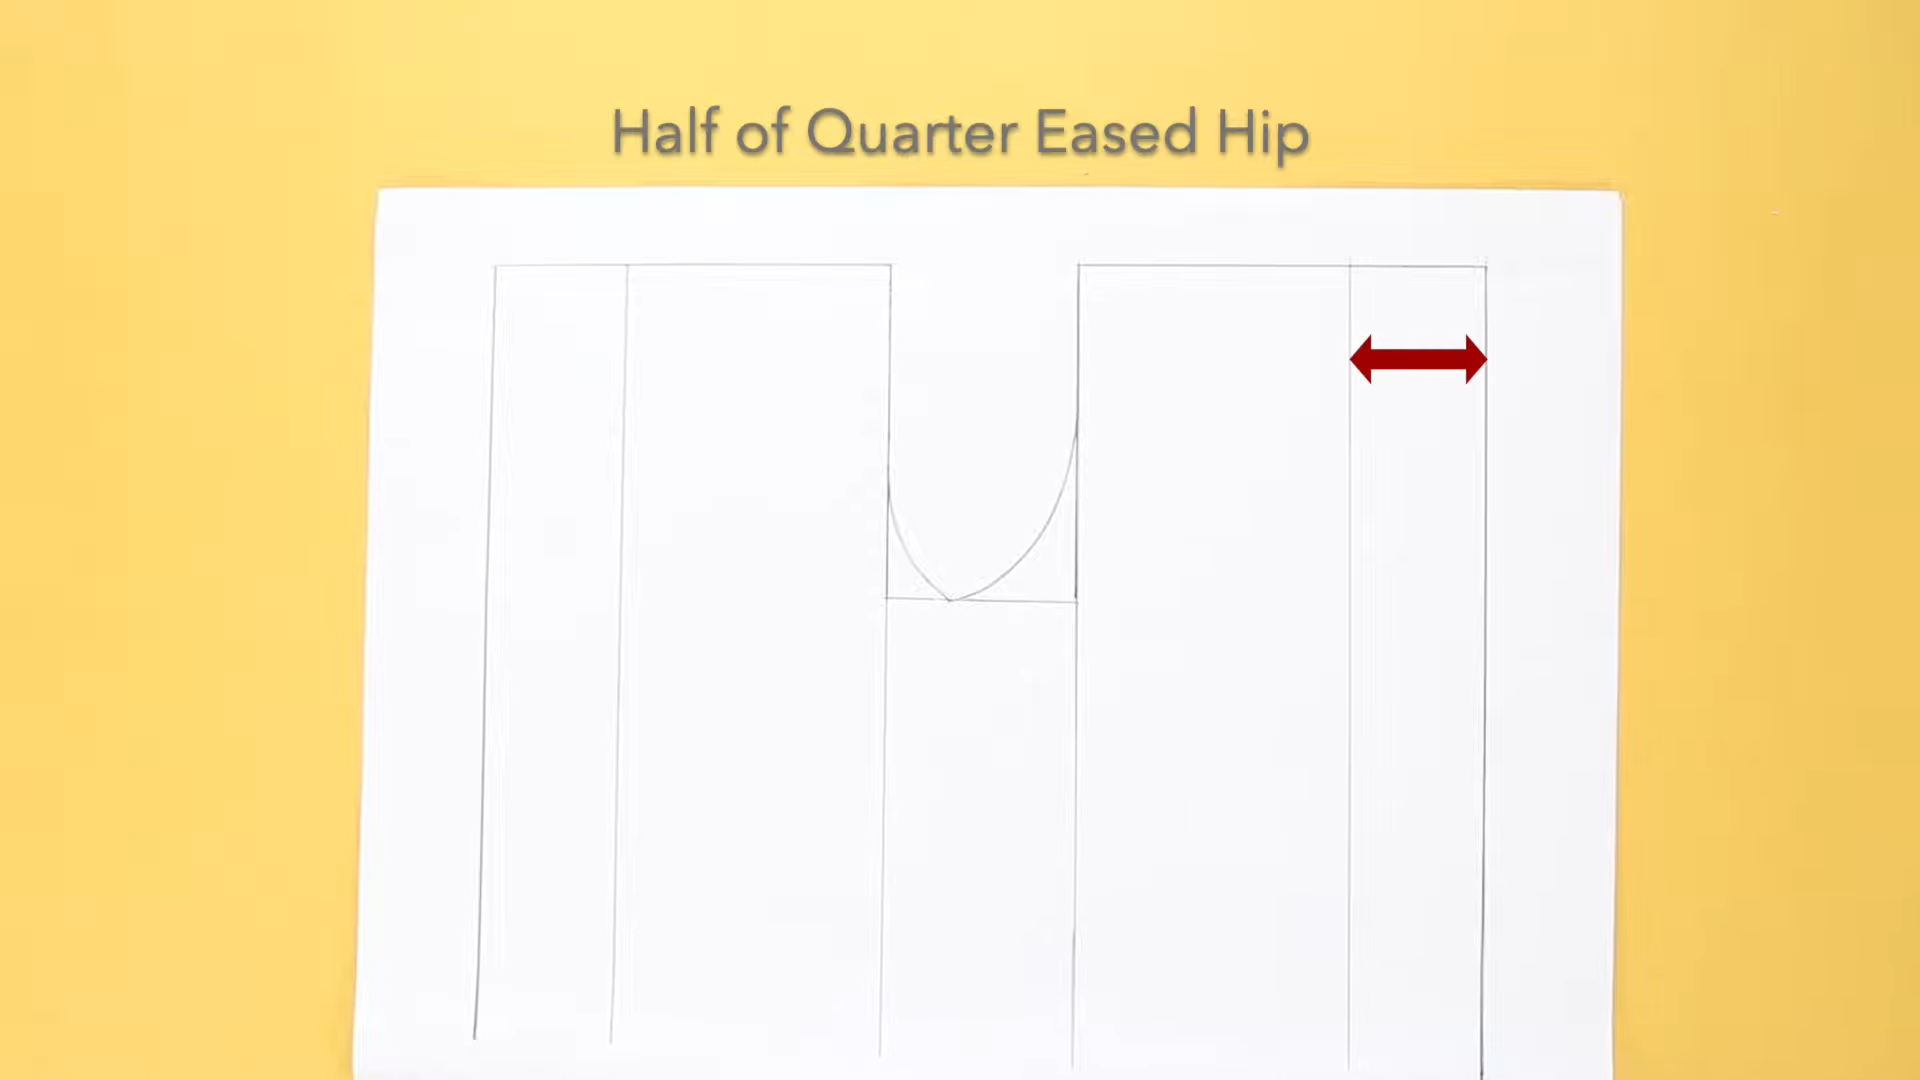
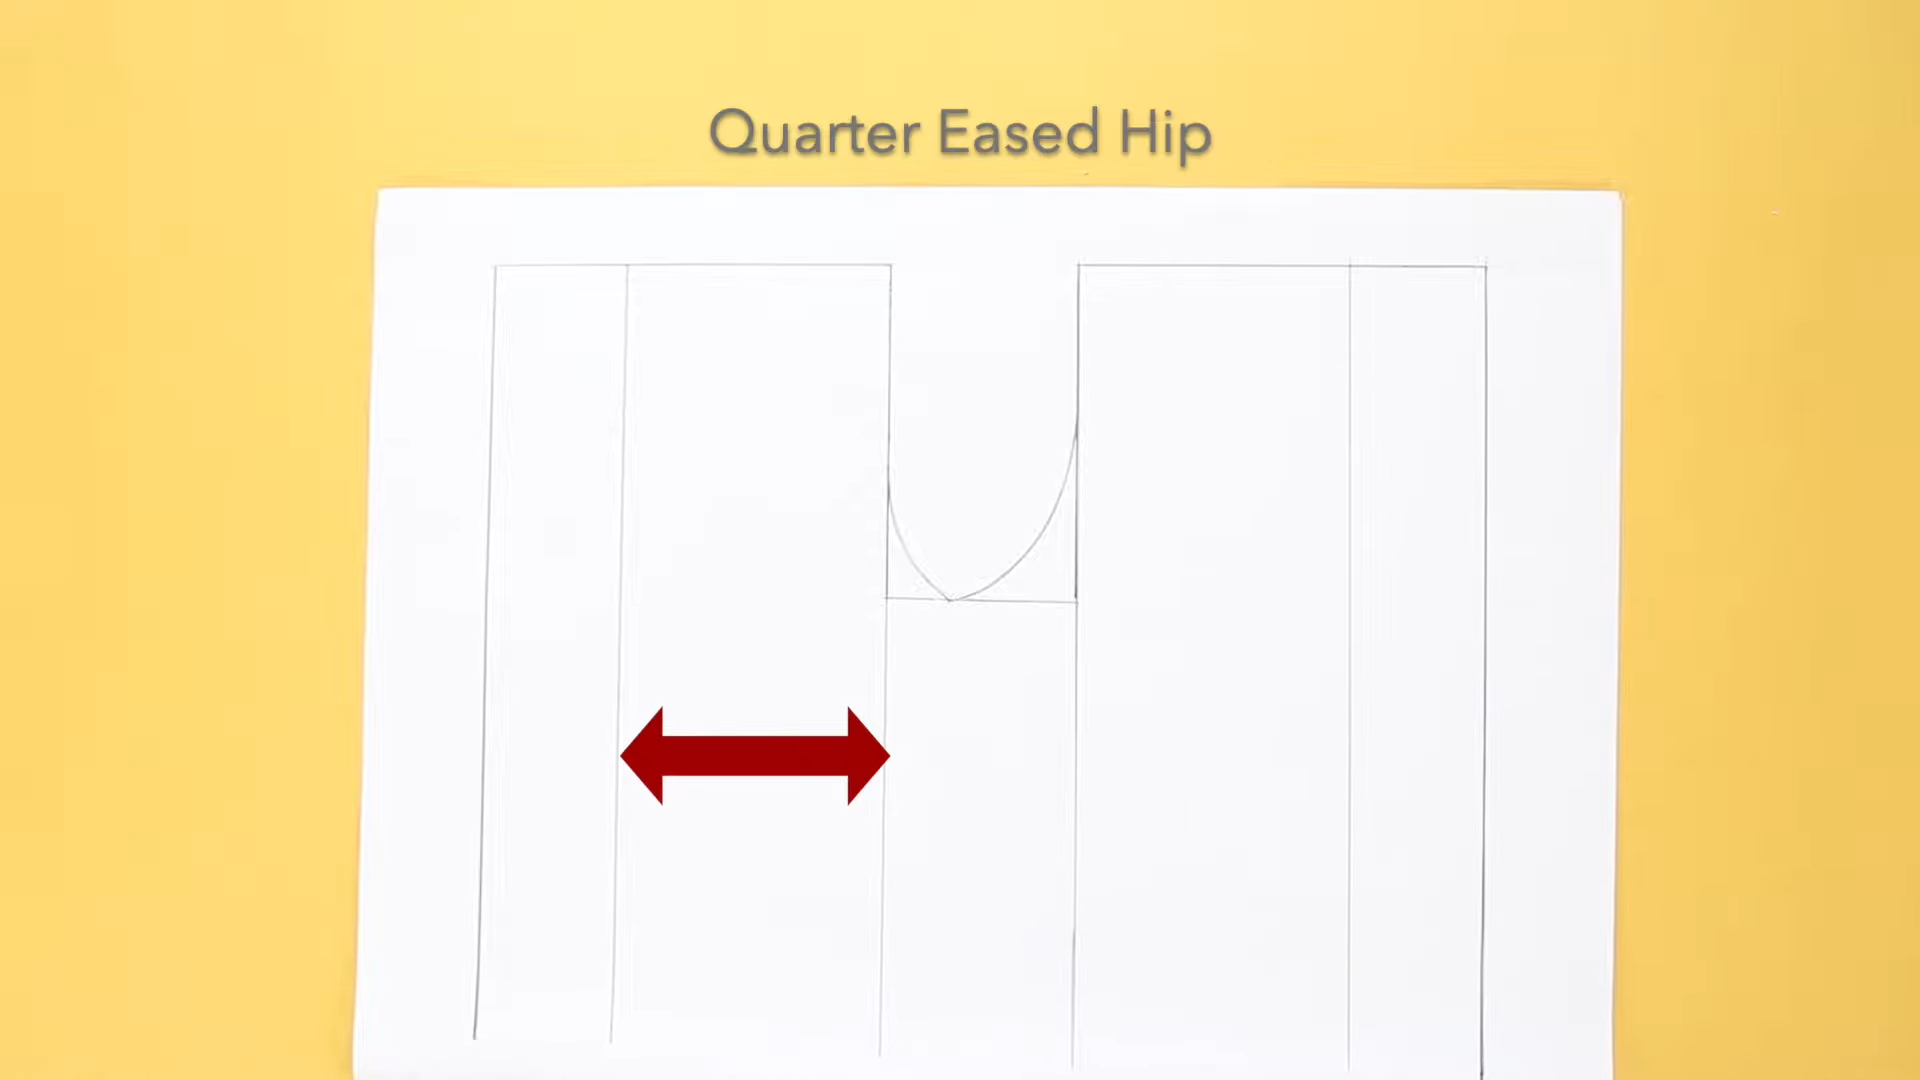
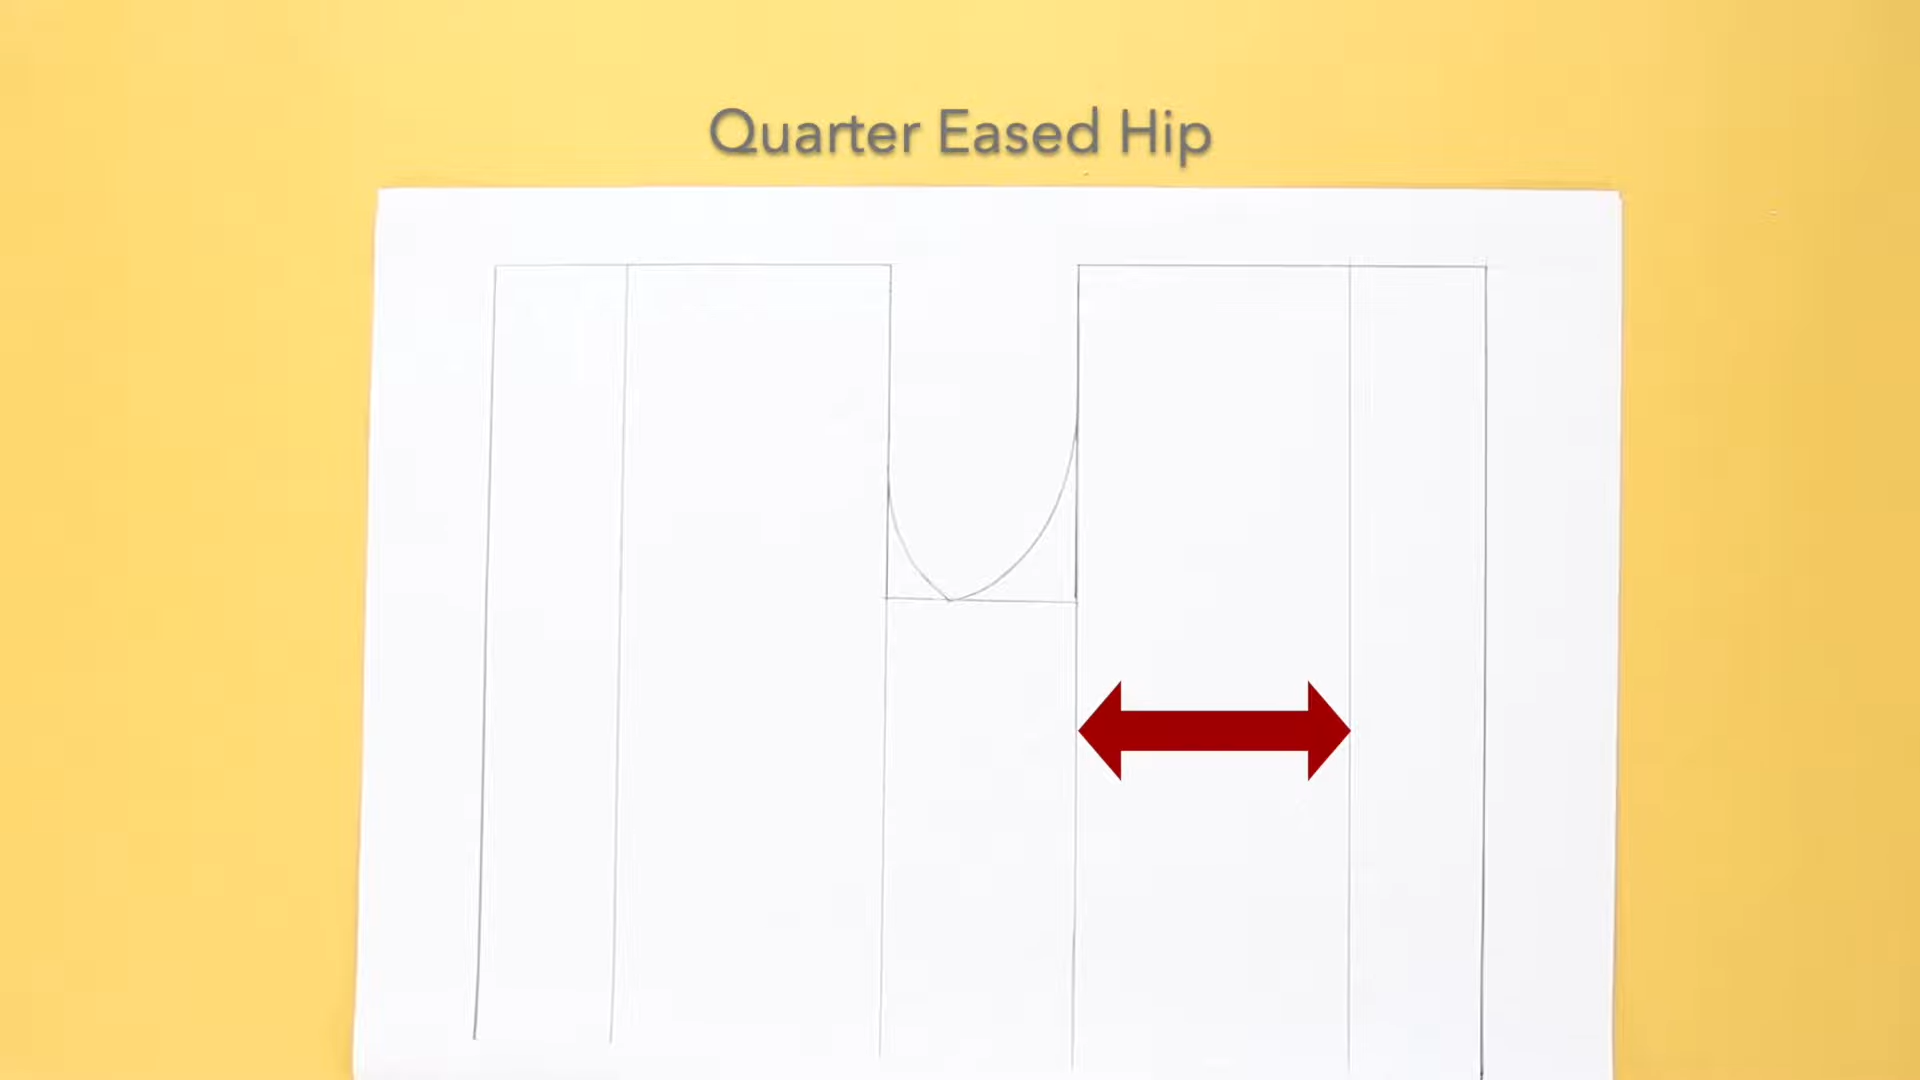
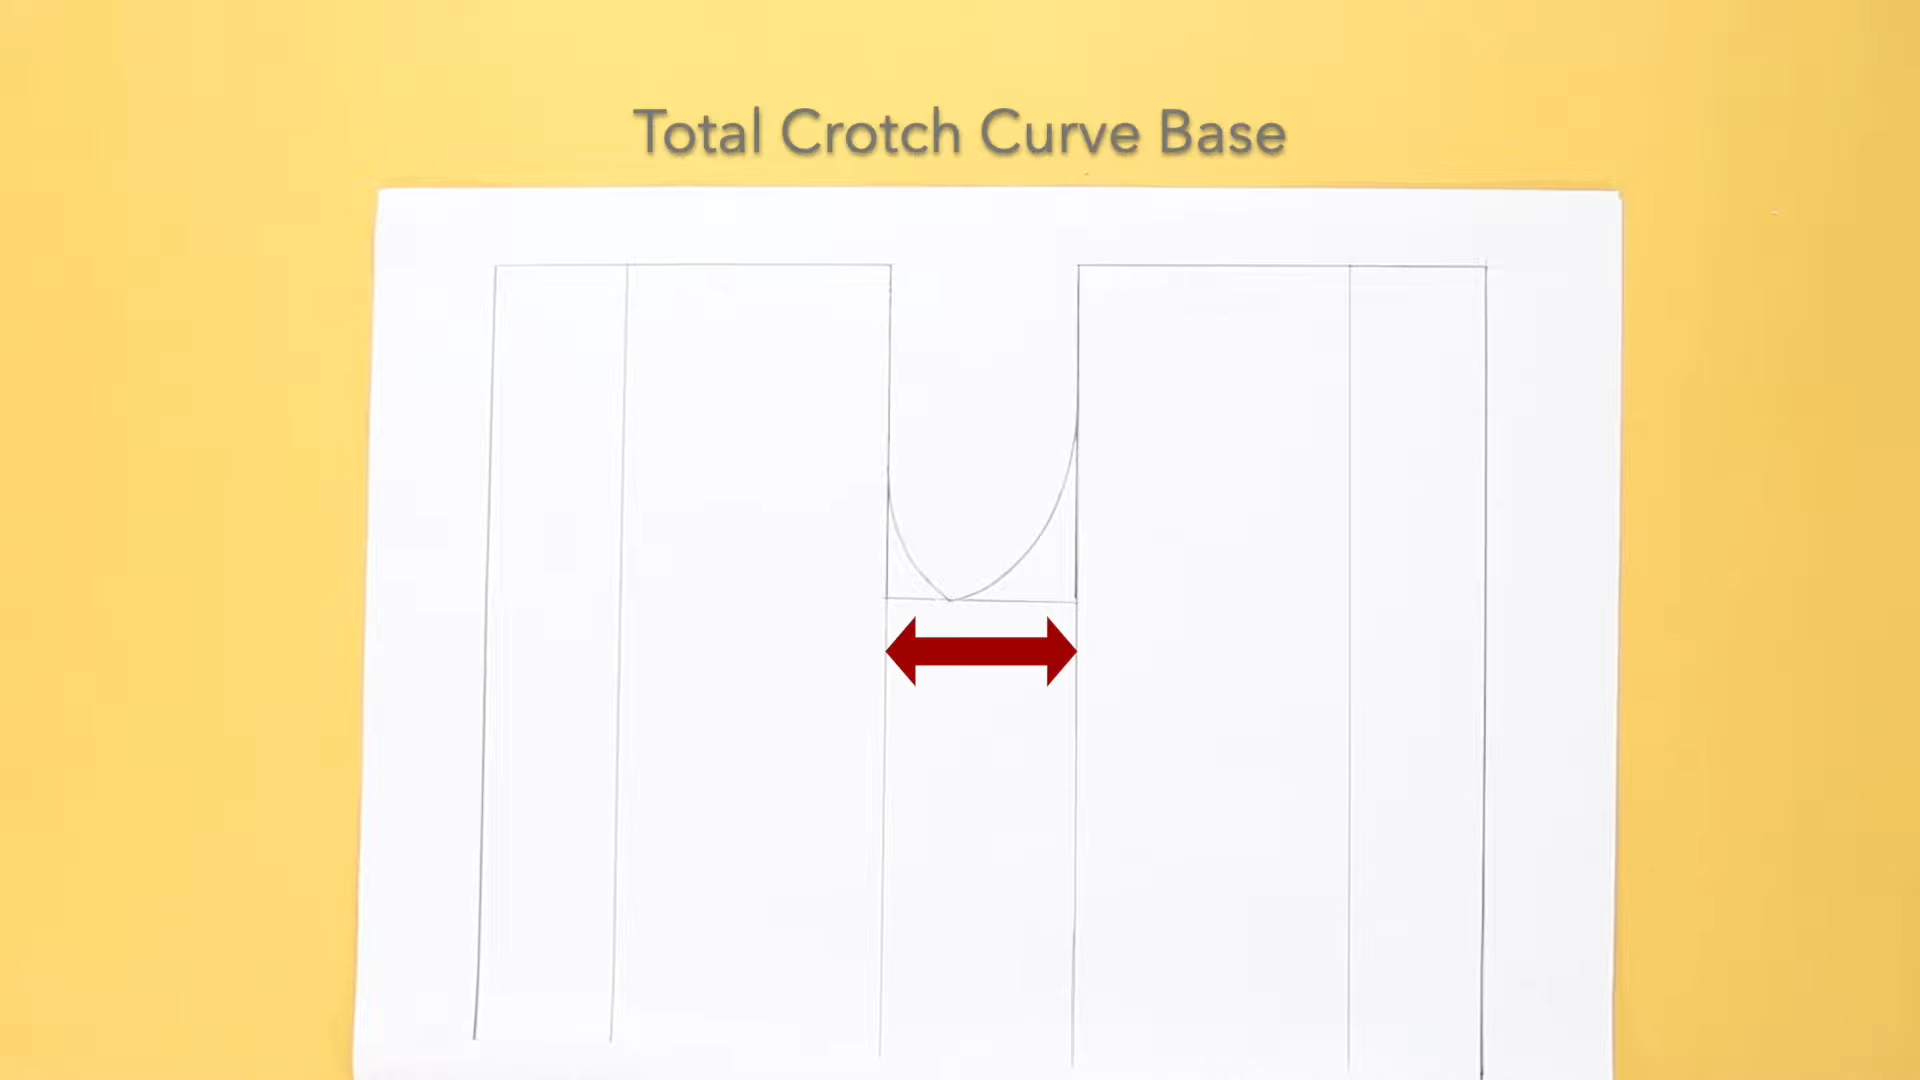
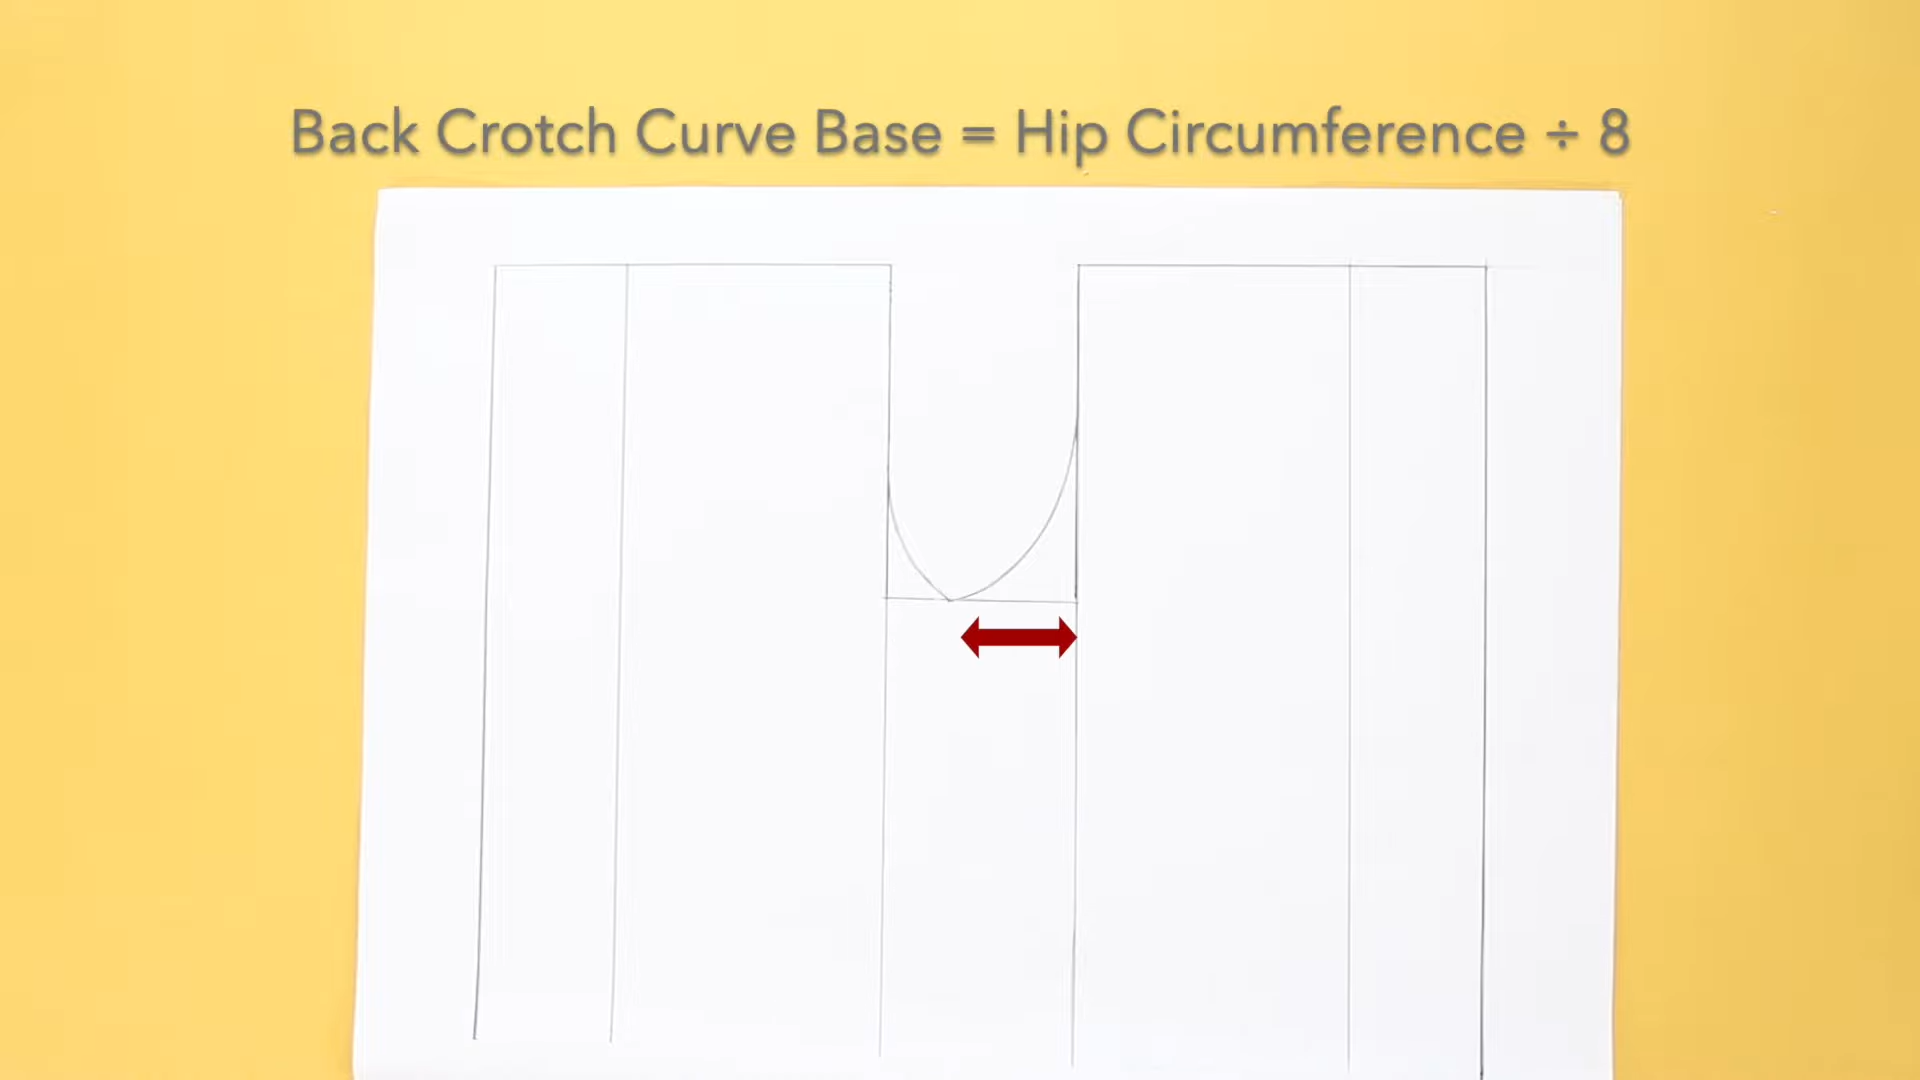
- Create the pattern: Follow the instructions in the video to create a pattern based on your measurements. The pattern will consist of the trouser front legs, trouser back legs, front drop extension, and back wrap extension.
- Cut the fabric: Place two layers of fabric on your cutting table and arrange your pattern on the wrong side of the fabric. Cut out the pattern pieces.
- Sew the crotch curve: Join both pieces of fabric by sewing along the crotch curve.
- Finish side edges: Finish the four side edges with a simple double fold.
- Draw waist-shaping tucks: Based on your previous measurements, draw four waist-shaping tucks on the fabric. Use pins to hold each tuck in place before sewing it down. Press down each tuck with a warm steam iron so that it lays flat.
- Finish the waistbands: Cut out two waistbands, one for the front and one for the back. Fold the top and bottom edges of the band half an inch on both sides and then fold it in half lengthwise. Press down the folds with an iron. Sandwich the trouser’s top edge within the waistband’s half-inch fold and pin both together. Sew the waistband to the trousers, making sure to finish the extreme ends of the waistband.
- Mark the back waistband: Stitch a marking on the back waistband so you can easily differentiate between the front and back.
- Hem the bottom edge: Finish the bottom edge of the trousers with a simple double fold.
Your wraparound trousers are now complete! To wear them, start by tying the front band around your waist, passing the crotch between your legs, and then tie the back band so that the knot shows in front.
Video: The best DIY Wrap Pants tutorial ever
Discover the Ultimate DIY Wrap Pants Tutorial by Nedoux Sews! Beginner-friendly, step-by-step guide to creating stylish and comfy wrap pants. Unleash your inner fashionista NOW! Watch & Share!
Enjoy your comfortable and stylish wraparound trousers!

I Like to write and read on fashion, may be that’s why “Fashion says “me too” style says “only me”