
Last Updated on August 5, 2023
A sewing machine requires proper set up before you start sewing with it. Every part of setting it up has specific steps to follow. From threading the machine, loading the bobbin and setting it in the sewing machine, setting up the pressure feet, inserting and removing the needle, and so much more.
One such task is to change a sewing machine needle. It is the part of the needle inserting and removing procedure. Now there are two things that you need to know and keep in mind. One is to know that the sewing machine needle needs to be changed regularly. The second is to learn the steps to do it.
Why Changing a Sewing Machine Needle?
Many of you might not know that a sewing machine needle needs to be changed quite frequently. When you are using the same needle again and again, sewing every project with it, it starts losing its sharpness. It turns dull. So, it doesn’t give you the perfect stitches that it should.

Then, different fabrics need different sizes of needles. When you want to try some intricate, fine design on a piece of simple cotton fabric, a small needle is the best option. If you are not changing the needle and trying to do your work with the already inserted thick needle, then it will just ruin your attempt.
Using a needle for a long time will result in a frequently broken thread. It will start stitching unevenly, and it might scrap the fabric as well. Delicate fabric will be beyond repair. You will have to discard it totally.
So you better change the needle and also use the right ones. The best option is to use a new one for every project. And if the project is a lengthy one, then you can use a couple of needles in one project only.
How to Change a Sewing Machine Needle
Changing a needle is easy only if you do it right. Make the change while starting a new project and change it depending on the fabric as well. Always remember to turn the machine off before changing the needle.
In Short: To change a sewing machine needle, raise the needle using the large wheel, then unscrew and remove the old needle. Store the old needle safely. Insert the new needle with the flat side at the back, push it up into the clamp, and securely tighten the screw using a screwdriver.
Follow the full steps we are going to explain below –
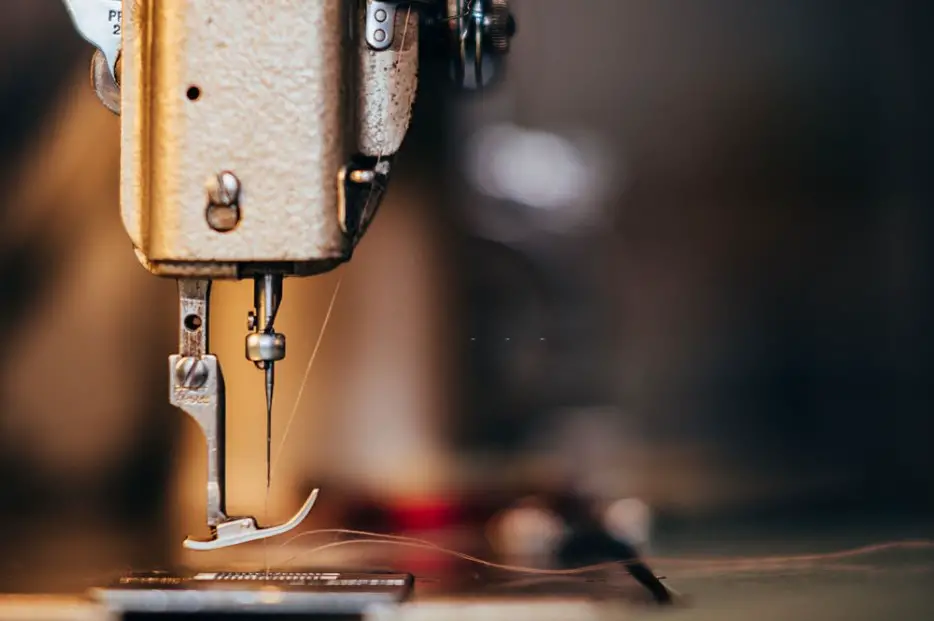
1. Step 1 – Turn off the machine & raise the needle

Changing a sewing machine needle is a straightforward process. Begin by ensuring the machine is off, and the needle is raised using the large wheel. Hold the old needle with your left hand, being cautious not to poke yourself.
2. Step 2 – Unscrew

There is a screw that has held the needle tight. You have to unscrew it. With your right hand, gently loosen the screw that holds the needle in place, using a screwdriver if needed. Turn the screw just enough to make the needle loose, then carefully pull it out.
3. Step 3 – Remove Old Needle

Now when it is completely unscrewed, pull it down. Then, pull it away from the clamp to remove it. Store it in the needle box. It is of no use, at least till the next project. Make sure you are covering the hole in the needle plate with something. Otherwise, it will fall into the machine.
4. Step 4 – Insert the new needle

Take the new needle – time to insert it. You will see a flat side at the back of the needle. Push it upwards the clamp until it hits the stop. First, screw it with the fingers and then again use the screwdriver to tighten it. Don’t keep it lose, even a bit. That is it.
Final Verdict
Tighten the screw firmly but not excessively. Remember to change your needle every 10 hours of sewing or after significant projects, and do not over-tighten the screw. Following these steps will help keep your sewing machine in good working condition. It is very easy, just try a few times and you are good to go.
You May Also Like to Read
- Coverstitch Machine
- Crochet Hooks for Beginners
- Sewing Scissors
- Lace Wedding Dresses
- Health Benefits of Sewing
“I like to turn a piece of string into something that I can wear.” I am dedicated to sharing knowledge on the necessary sewing equipment in The Sewing Stuffs.
